Our Car Camping Kit
We live in Manhattan, and like to get out into the woods a few times a year to go camping. I’ve done some extended backpacking trips, but mostly what we’re talking about here is car camping at a campground. I love gear, but even with the car there’s only so much that can fit, so I put together this post to talk about the stuff we actually take with us. It amazes me just how much smaller and lighter backpacking gear gets every year, but for the most part for car camping your main concern is size and not weight. If you have the time and the inclination, a lot of these things are often available on sale at a substantial discount a few times a year at backpacking shops. I’m quite fond of EMS, REI, and Campmor. Otherwise, I’ve linked to Amazon for specific items I like, and I’ll get a cut if you buy something. Everything linked here is either something I’ve personally used or as close to it as I can find. I’ve also interspersed random pieces of gear advice. My general recommendation is to buy or borrow the stuff you absolutely know you need, and then when you find yourself frustrated that you’re doing without something or using a makeshift solution you’re not happy with, buy that thing you’re missing for the next trip. Hopefully this is a helpful reference for items you might want to consider bringing.
Tent.
There are a lot of options for tents, but generally speaking, what you want out of a tent is:
- it will keep you warm when it’s cold (but well vented so it doesn’t build up a lot of condensation)
- it will keep you dry when it’s wet
- it’s relatively easy to put up and take down
- has enough room for the number of people sleeping in it and your gear.
You’ll probably also want one that’s high enough that you can stand up in it, but that’s a personal decision.

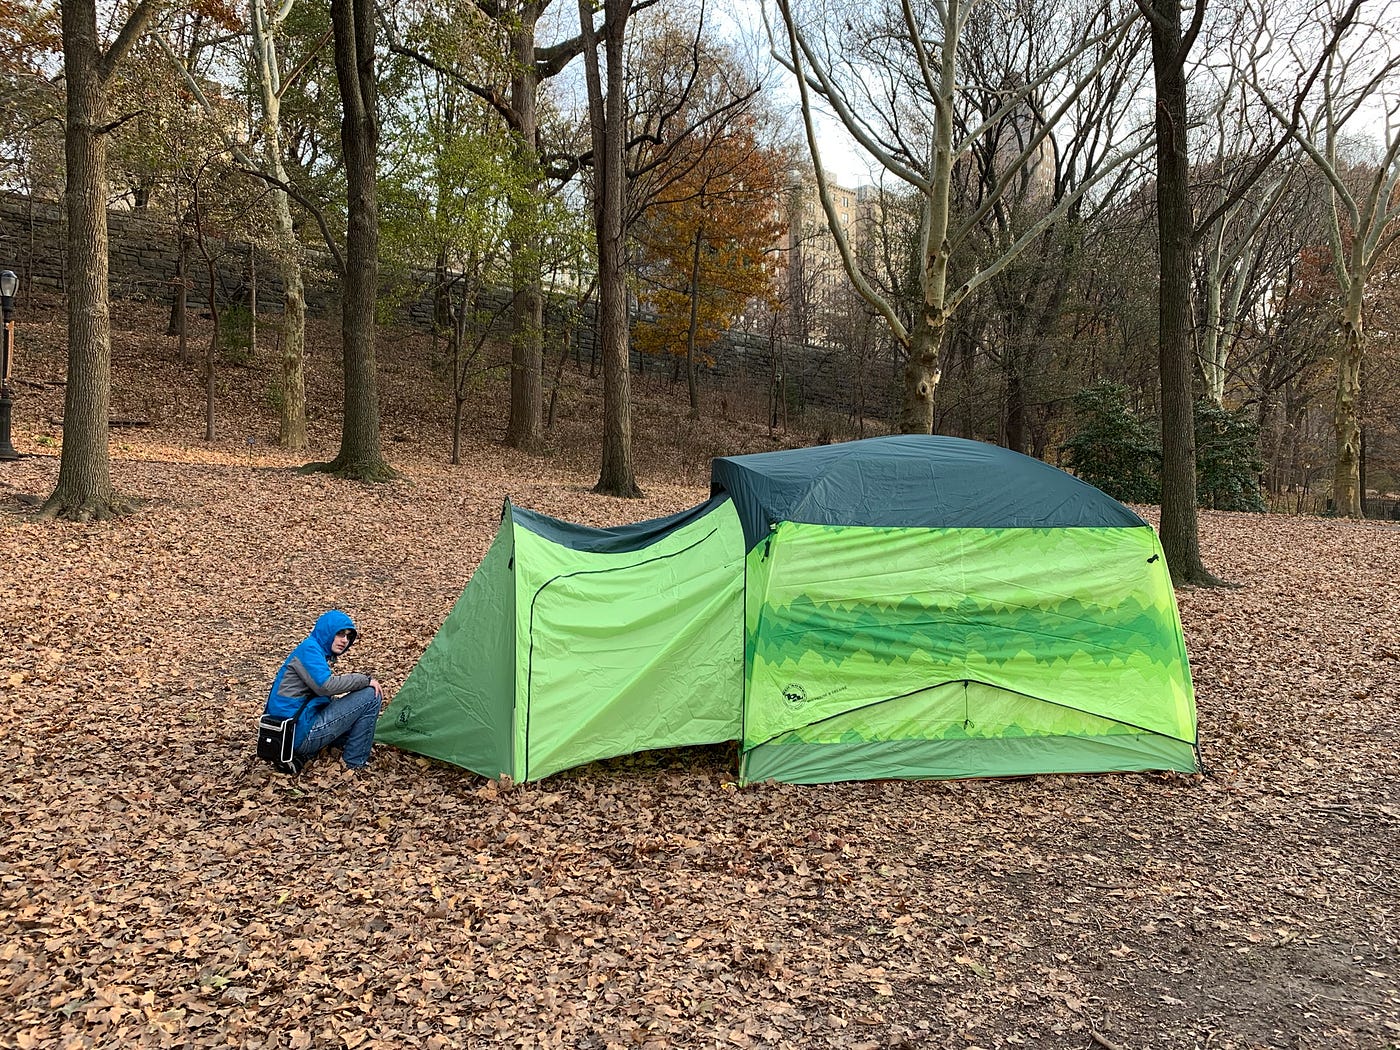
Also get a ground cloth that fits under the tent — it should not stick out on any side. If it does, it will draw water (rain or condensation) under the tent and you’ll be unhappy. In a pinch, you can use a tarp or painting dropcloth, but a thicker plastic ground cloth that’s cut to fit your tent footprint is easier to deal with. Most common tents these days use shock cord poles, and that’s probably what you want unless you have a good reason not to. When looking at tents to move to a slightly smaller one than the one pictured above, I found that a lot of them had wide open mesh tops and a full-coverage rain fly. In inclement weather conditions or really nice weather, that’s probably fine, but I wanted something more in the middle — with windows that could zip open and a partial cover rainfly that didn’t fully cover the windows. I found this Columbia 6-person tent, which seemed like a nice compromise, but our first outing with it revealed a significant design flaw of the “Instant Tent” — because the poles aren’t solid all the way through but have a hinge in the middle, they have a tendency under any kind of stress (e.g.: leaning against the tent or heavy wind) to fold at the hinge and partially or completely collapse the tent. This is a complete dealbreaker for me, and despite their ease of setup and takedown, I can’t recommend this kind of tent at all. There is a similar shock cord pole model, which also seems nice, but now I’m hearing that Columbia may have discontinued these tents. I won’t buy a tent without a decent warranty, so the search continues.
Update: we found our new tent! I found a good deal on this Big Agnes Big House 6 Deluxe on sale, and it’s everything I wanted. Easy to put up, tall enough to stand up in, with well-thought-out gear stowage and connectors. This nominally sleeps 6, so it’s big enough for the kids to hang out in, but they’re old enough now that they’ve moved into their own tent for sleeping. Of course it seems to have now been discontinued so you probably won’t be able to find one, but they have a slightly different Big House model in the current lineup.
A tent repair kit is a good investment. Your tent should come with plenty of stakes, but you might want to replace them with steel ones — they’re a bit easier to get in the ground. For casual use, you’re probably not going to be dealing with high wind. I’ve never had the need to do additional seam sealing on my tents, but some people swear by that. In my experience, it’s only necessary if you’re camping in a lot of heavy rain.
Make sure the tent is fully dry before packing it up — before you leave take everything out of the tent, open all of the windows, and let it air out for an hour or so. If you have to pack up in the rain, take it out again when it’s dry as soon as possible and let it fully air out before packing it up again. If you don’t, it will get mildewy between uses, and no one wants that. I keep meaning to buy a small whisk broom to brush out the inside, but I never seem to get around to that. It’s not that a big deal to turn the tent over and shake it out before you pack it up, and you may want to do that anyway to let the bottom dry off.
I bought the family tent we use on clearance and it’s no longer made, otherwise I’d link to it. It’s a 9-person tent with two room dividers, which is great when you have smaller kids. Eventually they moved out into their own tent and now we bring two separate ones on trips.
Sleeping Bags
For car camping, sleeping bags are relatively straightforward — you don’t have to worry so much about weight or size within reason, just get one that’s rated for the approximate temperature it will be at night where you are. Pick one that has an inside material you find comfortable. Compression sacks of various sizes are really helpful for packing down sleeping bags and clothes. If you’re a couple, you want to get two bags that can zip together to make one big one. (Update: I found this absolutely amazingly well designed Kelty double sleeping bag. It has MANY nice usability features including separate blanket inserts and a pillow niche. My only complaint about it is that the material by itself is a bit slick, so you might want to pair it with an inner bag if you don’t like that.) Instead of getting a warmer bag, consider supplementing with a fleece or silk liner. These Coleman Stratus bags are nice and they also zip together. You’ll probably also want some sort of foam or inflatable mattress pad to go under them (I picked up a Nemo Roamer on sale for next year, but haven’t tried it yet). This will keep you warmer and more comfortable. Those also come in double sizes (if you can even find them — they seem to be getting more rare), but be careful about space — these can easily get very bulky. Bring something to use as a pillow, or actual pillows.
On your last day, open up the sleeping bags and drape them inside out over your car to air out.
Comfort & Campsite
Most campsites come with picnic tables, but it’s nice to bring some extra chairs to sit around the fire on. I’m a huge fan of the Helinox One chairs — they fold up very small and are comfortable for most children and adults. They’re also great for smaller outings and beach trips (but take the rubber tips off first, otherwise they’ll get stuck deep in the sand and lost. I speak from experience. These replacement tips will fit.). There’s also a companion table. The knockoffs have started to appear, which are much cheaper, not as nicely constructed, but still sturdy and without the reliable warranty and support.
I won’t leave home without a parachute hammock or three. They come in multiple sizes — from one person to three and pack down to almost nothing. There are many kinds of tree straps available that will let you hang your hammock without damaging the trees, but I’ve found the Atlas strap system to be by far the easiest to set up and take down. A few lightweight carabiners will save you some time (make sure you get ones that are meant for climbing so they’ll hold the weight). They’re small enough that I often bring them out to the park for lounging and reading. I’ve also discovered that hammock tree straps, some paracord, and a few carabiner rope tighteners can be combined to make an easy and flexible clothesline.
I love love love these Luminoodle flexible LED light strings. I’ve accumulated a number of small portable USB battery packs over the years (and they keep getting cheaper), and these light strings are a great way to repurpose them when they don’t hold enough charge to power your devices anymore. The bag they come in doubles as a diffuser, they can be hung from branches or spread out on tables, and they can be strung around trees pretty easily. Three of them together spaced out were bright enough to light our whole campsite. They also come packaged with a battery if you can’t find your own for some reason. Some high capacity USB batteries will shut off when used with these because they don’t draw enough power, but some newer ones have a trickle charge mode that works great (on Anker batteries that support it, you can turn this on by pressing and holding the power button until the LED turns green).
Food
Presumably you’re going to want to have some way to cook your food. The campgrounds we go to typically have fire pits with grills, so we don’t have to bring that. We bring a portable multi-fuel stove which is a real throwback to the 70s — it’s basically the same model my parents used when they took us camping, and my wife and I won it in a general store raffle on our first outing together. If we had to buy something new now, we’d probably get something more compact, but it’s a real workhorse and has served us well. The propane one is probably easier to deal with, and there are much smaller options if all you want to do is boil water or scramble a few eggs and you’re not cooking for a crowd. Regardless of which one you choose, it’s nice to have a some sort of burner even if it’s very basic. I usually just bring a regular small pot and a ceramic non-stick frying pan from home.

While I get more elaborate at home, for cookouts in the woods I usually like to keep it reasonably simple — hot dogs, sausages, hamburgers, steaks, grilled chicken (though sous vide cooking these last two items beforehand does make life a lot easier), and an assortment of vegetables. Oatmeal, eggs, and sausage or bacon for breakfast. We bring cold cuts to make sandwiches for lunch, and lots of fruit. Some way to make coffee and/or tea. Cold brew concentrate is handy. I don’t usually do pancakes when camping, but if you like that, don’t forget to bring a spatula (which I don’t have listed below).
Many campgrounds will sell you ice and firewood onsite, but not all of them — check beforehand.
You’re going to need a cooler. After a few summers of doing this, I splurged on a nice Coleman steel belted one, but any large cooler will do for a few days. This past year I upgraded again to an RTIC Ultralight 52 quart cooler and I really like it. It holds almost as much as the Coleman, keeps ice colder noticeably longer, and has a nice divider and basket included which makes multi-day organization a LOT easier.
You’re going to be packing ice in the cooler which will melt (usually a 5lb bag per day is enough), so make sure food is packaged in containers or wrappers that can get a little wet. Egg cartons in particular won’t hold up well — you’ll probably want these egg boxes. Every day or two when you’re ready to refill with more ice, drain the water out of the bottom of the cooler first. If necessary, you may also want to take most of the food out and repack it — it’ll get messy when you’re constantly taking things in and out. Keep the cooler closed as much as possible to conserve your ice.
You’ll need a water carrier to bring water back to your campsite (most of the campgrounds have spigots you can fill at, but check that). There are many choices. These are pretty nice. They all leak after a while and need to be replaced.
We picked up a nice set of 4 full settings of lexan dishes and utensils at Eddie Bauer, but they don’t seem to make it any more. Something like this set would do nicely.
A collapsible dishpan makes dealing with dirty dishes easier. I like this camp soap — just a drop goes a long way. Bring a sponge in a small ziploc bag. Bring a small cutting board. If it fits in your dishpan, you’ll be happier.
Don’t forget the marshmallows! I’m torn between the woodland purity of finding your own stick in the woods to use for roasting, and the gadget gear late night infomercial awesomeness of the telescoping rollaroaster. Fortunately, I picked up a few of these on sale so I don’t have to choose something else.
Cooking Kit
I love to cook, and I put together this portable cooking kit in a knife roll to supplement the things I often find missing in kitchens I’m borrowing. But it’s also really useful for camping trips.

There are only really three indispensable items in here — a knife, salt, and extra-long tongs. Everything else is “nice to have”:
- Chef’s knife. I use ceramic knives extensively, and I much prefer the black blades. Be careful — they will snap if heavily flexed. But otherwise they’re very easy to maintain, easy to clean, won’t react badly if you don’t clean them, and don’t require sharpening.
- Paring knife. Something small for trimming.
- Micro-serrated utility/slicing knife. I love this knife. It’s so useful, I’d almost choose it over a chef’s knife if I had to pick only one. It’s fantastic for slicing anything with a skin, and it’s great for slicing sandwiches without tearing them apart.
- Tongs. After a knife, the most useful cooking tool. Good for moving things around on the grill and readjusting hot logs and coals. If you have to choose, the longer the better. Get regular stainless.
- Heavy shears. Useful for cutting meat and other tasks. They break apart for easy cleaning.
- Extra-long wooden spoon. This is not really a camping thing, but it’s in the kit because most kitchens don’t have a stirring spoon that will reach to the bottom of every pot.
- Peeler. Most people usually have a peeler, but it’s usually dull, and therefore useless. I bring a sharp one. The blades are replaceable.
- Flat whisk. I like this flat ball whisk, but really any will do.
- Kitchen twine. Wrap a bunch around a small piece of cardboard to fit in the kit.
- Skewers / fire wires. I love these flexible skewers. I mostly use them for vegetables, and they make it really easy to fit in the empty spaces on your grill. They’re easy to use, easy to clean and they pack down small.
- Salt & pepper
- Silicone basting brush. Good for spreading bbq sauce or oil on food while it’s cooking. Silicone is easier to clean than a bristle brush.
- Sharpie.
I also usually bring a few small plastic sheet cutting boards and stainless steel bowls. Aluminum foil is great for cooking in, wrapping up sandwiches for hiking, and storing leftovers. I usually bring a stack of pre-cut sheets in a ziploc bag.
Utility Gear
I have a bag of gear that we bring with us. Not everything in here is critical, but most of it is useful. I started with a few things I needed and slowly built it up over time as I found things I wanted.

The main essentials:
- Rubber mallet. Useful for banging in tent stakes and general pounding tasks. Otherwise you’ll have to find a rock.
- Flashlights / lanterns. You should have one flashlight per person, and it’s nice to have a little portable lantern or two for your table and tent. The orange one is a nice solar-powered LED lantern I got for free with my solar USB charger. These little LED flashlights are super cheap and great.
- First aid kit. The basics include band-aids, neosporin/bactine, some kind of painkillers, and a tick puller.
- Some sort of firestarter. I like that small portable lighter, and I have some waterproof matches as a backup. The longer fireplace matches are handy for lighting deeper into the fire.
- Nylon cord. We picked up this roll in a marine surplus store in Provincetown. We’ve had it for almost 20 years and have barely made a dent in it. We’ve used it for a variety of things from making necklaces to hang glow sticks from to putting up clotheslines. This is basically paracord.
- Duct tape. It’s strong tape.
- Bug repellent. It keeps the bugs away. At least 30% DEET is recommended for tick control.
- Multi-tool. Just generally useful for fixing things. Make sure you get one with pliers. You don’t need to go overboard on this. This probably has a sufficient knife on it for most needs, but a larger folding knife can also be useful.
- Paper towels. We usually bring a few reusable dish towels, but for some things it’s nice to have disposable paper towels.
- Assorted repair kits. I keep all of the repair kits I’ve accumulated (tent, hammock, extra chair parts, etc…) together in a large ziploc bag, so I always know where to look for them. Someone recently recommended Tenacious Tape to me, and it’s great stuff for minor repairs.
All of the rest is optional but nice to have:
- Emergency heating (mylar blankets and chemical heaters). These are small, portable, relatively cheap, and will keep you happy if it unexpectedly gets colder than you expected.
- Emergency charging (USB solar panel + AA battery phone charger). You’ll be away from electricity for a while, and it seems like a decent precaution to have a way to charge your devices in a pinch.
- Extra cutlery. Nice if you have friends join you, someone forgets theirs, or something breaks.
- Small waterproof case. Good for cards / money / etc… while swimming. Also consider a dry bag if you’re going to be boating.
- Baby wipes. I also take these on bike trips — they’re excellent for cleaning all kinds of things, and they’re good at getting oil and grease off.
- Waterproof playing cards. Get two decks so you can play Spite & Malice.
- Cyalume light sticks. Good in emergencies, and the kids love them.
- Head lamp. Sometimes if you have to work in the dark, it’s nice to not have to hold a flashlight. The prices on these have dropped so substantially that I feel like there’s little reason not to have one even if you don’t end up using it much.
- Solid fuel cubes / portable stove. I bought these to experiment with them, and discovered that in a pinch the esbit solid fuel cubes make excellent firestarters for both wood and charcoal fires, even without a chimney starter. Weber also makes some very inexpensive ones which work well.
- Folding Saw / Small hatchet. Sometimes firewood you buy will be too big and you might want to split off smaller pieces.
- Ping pong balls. Ok, these are just in there from some other trip we bought them for. There’s no super secret camping use for them that I know of. Please don’t do this.
- Amazing tape. I don’t use it very often, but I love that this stuff exists. It sticks to itself and it’s reusable.
- LED Light-up bracelets. Good for keeping track of the kids in the dark, and they love them.
- Extra advil / tylenol.
- A few extra ziploc bags. They’re waterproof, you know.
Other gear that doesn’t fit in this bag:
Two-way pump. This is handy for inflating and especially deflating roll-up foam mattresses. I also discovered on our last trip that it makes an excellent bellows for starting a stubborn fire when the wood is too wet. Packing this saved more than its size in being able to compress down our inflatable mattresses.
Tarps. You can string them up over your picnic table if it’s raining, or fold them up and use them as a shoe mat in front of your tent. My friend Sarah adds “the thing you don’t realize when you buy a tarp — it’s not as big as you think”. If you actually want something you can hang up over a picnic table, you probably want it to be at least 15–20 feet on a side if not more. There are a lot of good opinions out there about how to hang them. She suggests this rope tightener to aid in tie-downs (you might want the carabiner version). In a pinch, tarps of many sizes are usually available at a decent hardware store. Tarps can also be used as ground cloths for your tent.
Personal Gear
This is a lot of individual preference, and you should tailor your clothing and accessories to what you’re going to be doing — hiking, boating/canoeing, swimming, etc… as well as the weather. Bring layers and be prepared for rain. Synthetics will dry faster and keep you warmer than cotton — and don’t forget that that applies to underwear as well. If you’re going hiking, get fitted for good boots and wear wool socks. Bring one more towel than you think you’ll need.
I take a lot of photographs, and I love this super-portable tripod.
Bandannas are useful.
Locations
If you’re in New York State, this campground guide is extremely helpful (PDF download). We’ve visited a few state park campgrounds, and they’ve all been lovely, but they each have different amenities. Reserve America handles campground reservations across the country and can help you with local guides if you’re not in New York. If you live outside the U.S., maybe something like this will help.
Phew. I think I covered most of it. I hope this is helpful! I’m happy for feedback — find me at @fields on twitter if you have questions.